Momento account setup
This workshop requires you to have an active Momento account. Don’t worry, it’s completely free to try and we will be well within the free tier today.
Initial Setup
- Navigate to the Momento Console - you might like to open this in a new tab or window.
- Create an account using single sign-on (Google or another provider) if convenient for you, or sign up via email confirmation.
Congratulations, you now have a free Momento account!
Create Your First Cache
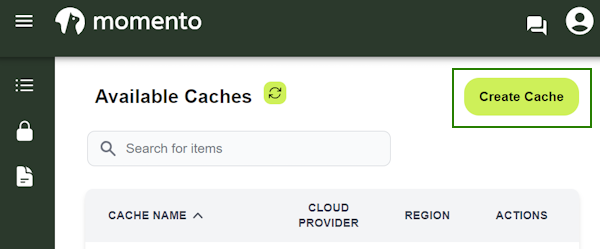
We need to create a cache to hold our pizza orders. We can do this via the user interface in the Momento Console.
- From the landing page in the Momento Console, click on the Create Cache button.
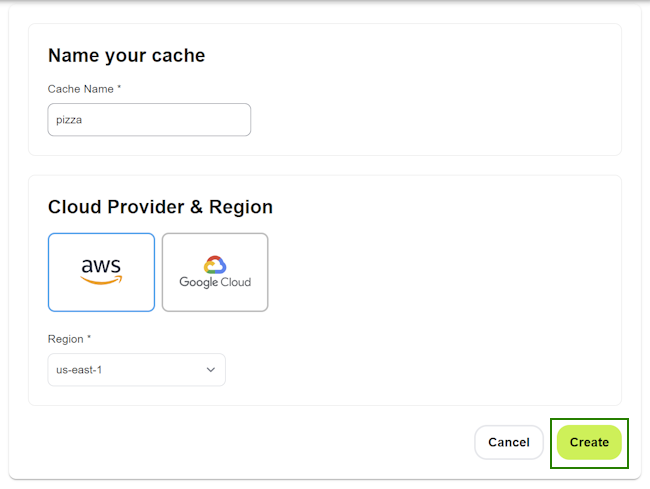
- On the detail page, type in
pizzafor the cache name and select the region that’s closest in proximity to you. - Hit the Create button to create your first cache!
Woohoo! Cache is ready to go! ✅
Generate an API token
To enable programmatic access to your new pizza cache, we must generate an API token. To do this, navigate to the token page by clicking on the lock icon via the console.
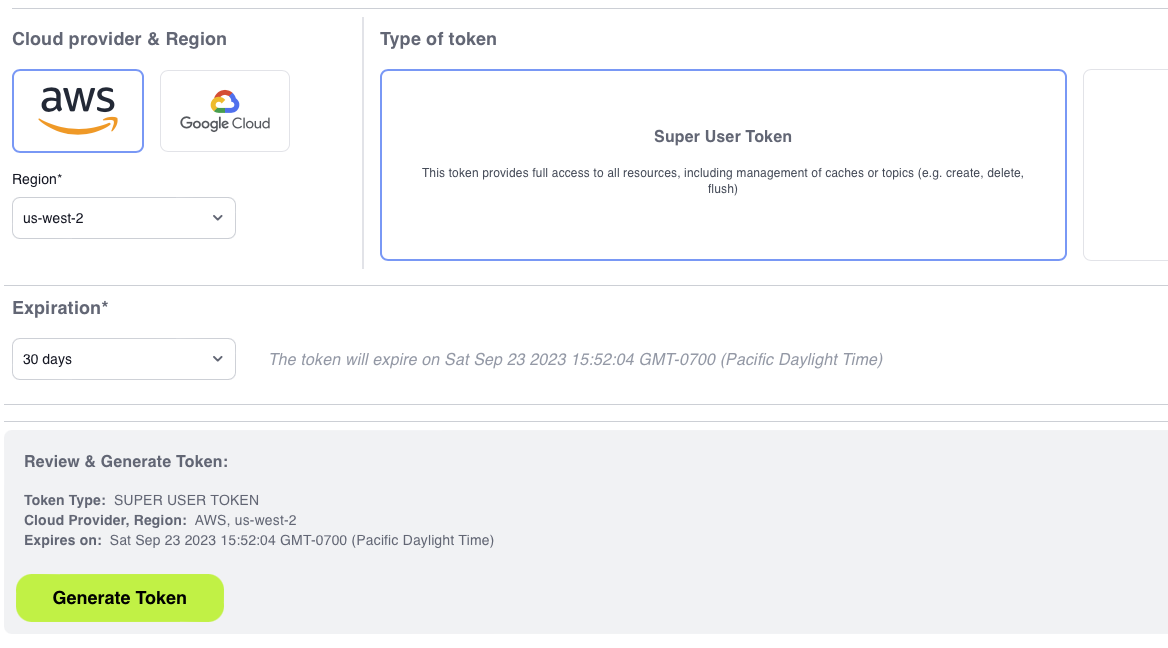
- Choose the same region you selected when you created the
pizzacache and opt for a “Super User Token”. - Select an expiration date. For our workshop, we can leave the default of 30 days.
- Select Type of Token “Super User Token”
- Click on the Generate Token button to create your API token.
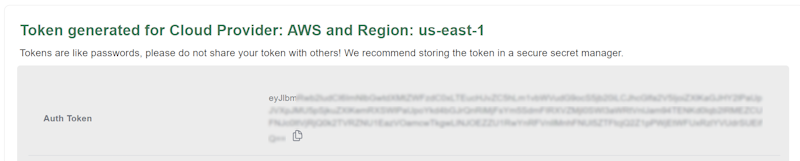
- Copy the value from the Auth token row in the table that pops up to your clipboard. We will need this value in an upcoming step. You might want to keep this Momento Console tab open in your browser in case you need to copy/paste the token again.
NOTE - it is not recommended to create tokens with no expiration date due to security concerns
Next, let’s setup our AWS account and development environment.